

Overview
If you run a WordPress site and want to sell Shopify products without migrating your entire website, Shopify's official "Sell on WordPress" plugin is exactly what you need. This guide walks you through installing the plugin, connecting it to your Shopify store, embedding products and collections using Gutenberg blocks, styling everything to match your theme, and managing orders from Shopify admin. You will also learn how to feature bundle products on content-driven WordPress pages to increase average order value.
Contents
When should you use the Sell on WordPress plugin?
Shopify's official plugin, Sell on WordPress, is the best way to get serious about selling on your WordPress site. It's made for creators and businesses who want to monetize their content on WordPress without compromising on the commerce experience. If you have an established blog, media site, or service business on WordPress, this plugin lets you add ecommerce without rebuilding anything.
This approach works well when you need a fast commercial layer (a publisher, creator brand, or service business can start selling without rebuilding the entire site), your catalog is focused (a small product range is much easier to present with embedded blocks than a large storefront), and you don't need full storefront behavior.
The plugin allows you to seamlessly integrate Shopify's checkout and product management system into any WordPress website, with no coding required. Instead of migrating your entire WordPress site to Shopify or settling for WooCommerce's limitations, you can leverage Shopify's commerce infrastructure while maintaining your WordPress content management setup.
What you need before you start
Before diving into the steps, make sure you have the following ready:
A live WordPress website with admin access.
An active Shopify store (a development store works perfectly).
The plugin is officially supported with default block themes, including Twenty Twenty-Three, Twenty Twenty-Four, and Twenty Twenty-Five. While other themes might work, they may require additional customization.
The plugin itself is free, but you'll need an active Shopify plan to sell products. Shopify plans start at $1/month for the first three months, making it very affordable to test this setup.
Step 1 - Install the Sell on WordPress plugin
The first step is getting the plugin onto your WordPress site. This takes about two minutes and requires no coding.
Log in to your WordPress Admin panel. Navigate to Plugins > Add New Plugin.
Click on Upload Plugin. Choose the plugin file you downloaded and click Install Now. After installation, click Activate Plugin. You can download the zip file from wordpress.org/plugins/shopify-plugin.
You should now see a new Shopify section in your dashboard, confirming the plugin is active.
Alternatively, you can search for "Shopify" directly in the WordPress plugin directory. Install and activate the official Shopify by Shopify plugin. After activation, a new "Shopify" tab appears in your WordPress sidebar.
What if the Shopify tab doesn't appear?
Make sure you activated the plugin after installation (not just installed it). Check Plugins > Installed Plugins and click "Activate" if the status still shows inactive. If you are running a very old WordPress version, update to at least WordPress 6.2, as the plugin requires modern block editor support.
Step 2 - Connect your Shopify store
With the plugin installed, you need to link it to your Shopify store so product data can sync in real time. This is a two-part process that happens across both dashboards.
Log in to your Shopify Admin dashboard. Go to the Shopify App Store and search for "Sell on WordPress." Look for the official app created by Shopify (check the logo to be sure) and click on it.
Enable the sales channel in Shopify. In Shopify admin, add the Sell on WordPress sales channel and generate the API access token.
In WordPress, paste the token into the Shopify settings area.
A success message should appear, confirming that your WordPress site is now connected to your Shopify store.
Your products, inventory, pricing, and descriptions still live in Shopify. Once you connect your Shopify store to your WordPress website, the plugin syncs that product data into WordPress so you can place items anywhere using product blocks.
Should you use the "Selling on WordPress" theme?
If you use the official Selling on WordPress theme, you can create a more seamless experience by having the logos on your checkout and order confirmation pages link back to your WordPress site. This theme also disables the Shopify storefront and redirects all storefront traffic to WordPress. Use this theme if WordPress is your only customer-facing site. Skip it if you also sell directly on your Shopify storefront.
Step 3 - Embed products and collections with Gutenberg blocks
This is where the plugin really shines. With the connection live, you can now start adding products directly into your pages using the WordPress block editor (Gutenberg).
Create a new Page or edit an existing one in WordPress. In the Gutenberg editor, click the "+" button to add a new block. Search for "Shopify." You will see two new blocks: "Shopify Product" and "Shopify Collection."
Select "Shopify Product." A dropdown menu will appear, showing all the products from your connected Shopify store. Select the product you want to display.
Click "Publish" or "Update" your page. Visitors to that page will see the product with its image, title, and a "Quick Shop" button. Clicking "Quick Shop" opens a stylish pop-up where users can select variants and click "Buy Now" to be taken directly to Shopify's secure checkout.
To embed an entire collection instead of a single product, choose the "Shopify Collection" block and select the collection you want to display. This is perfect for creating curated landing pages or showcasing product categories within blog posts.
Tip - Use embeds inside intent-heavy content. Product blocks work best in buying guides, comparison posts, and educational pages with clear commercial intent.
What if I use Elementor or another page builder?
The Shopify WordPress plugin is designed for Gutenberg. Unfortunately, it does not work natively with Elementor or other page builders without the help of third-party plugins or a developer. The plugin is built for the Gutenberg block editor, but you can still use it with other builders by inserting Shopify product shortcodes or using HTML widgets. Just keep in mind the integration isn't as smooth outside Gutenberg.
Step 4 - Style the Shopify blocks to match your WordPress theme
Out of the box, the Shopify blocks inherit some styling from your WordPress theme, but they may not perfectly match. A little CSS goes a long way toward making the product embeds look native.
The products' basic styling, such as button colors and fonts, is inherited from your WordPress theme. Currently, the Shopify blocks don't have any further styling options, though additional customization can be achieved with CSS.
Use CSS targeting .shopify-block classes so the module fits your existing theme instead of looking like a foreign element. You can add custom CSS via your WordPress theme's Customizer (Appearance > Customize > Additional CSS) or through a child theme stylesheet.
The plugin lets you adjust layout, alignment, image size, and product information within Gutenberg. If you're comfortable with CSS, you can style the blocks to better match your site's design.
Tip - Keep styling consistent: match button styles, spacing, and typography to the rest of the site. Limit clutter: too many embeds on one page can make the experience feel like an ad unit rather than a curated buying path.
Can I customize the checkout page?
The checkout page itself is hosted by Shopify, which is both a strength and a limitation. It's fast, secure, and optimized for conversions, but customizing the checkout design is limited unless you're on Shopify Plus ($2,000/month). On lower-tier plans, the checkout will inherit your brand colors and logo, but it won't be a pixel-perfect match to your WordPress design.
Step 5 - Manage orders and inventory from Shopify admin
Once a customer completes a purchase through the Shopify checkout, everything flows into your Shopify admin. There is no separate order management needed in WordPress.
Customers check out through Shopify's secure, optimized checkout system. All order management, inventory tracking, and customer data sync directly to your Shopify dashboard.
Update your products in Shopify, and changes appear instantly on your WordPress site. There's no need to reimport, manually resync, or manually edit listings. This means your content team works in WordPress while your commerce team works in Shopify, with no overlap or confusion.
The final, crucial step is to configure your checkout preferences within your main Shopify admin dashboard. Ensure your shipping zones, tax rates, payment gateways, and order notifications are correctly set up. Since the checkout is powered by Shopify, all transactions will be processed securely under these settings.
Step 6 - Feature bundle products on your WordPress pages
Product bundles are one of the most effective ways to increase average order value, and they work beautifully in a content-driven WordPress environment. If you sell curated kits, build-a-box bundles, or multi-step product selections on Shopify, you can embed those bundle products directly on WordPress pages using the same Gutenberg blocks.
Shopify's native Bundles platform creates bundle products that appear in your catalog just like any other product. When you build a bundle using a Shopify app, the resulting bundle product syncs through the Sell on WordPress plugin and can be embedded on any page or blog post.
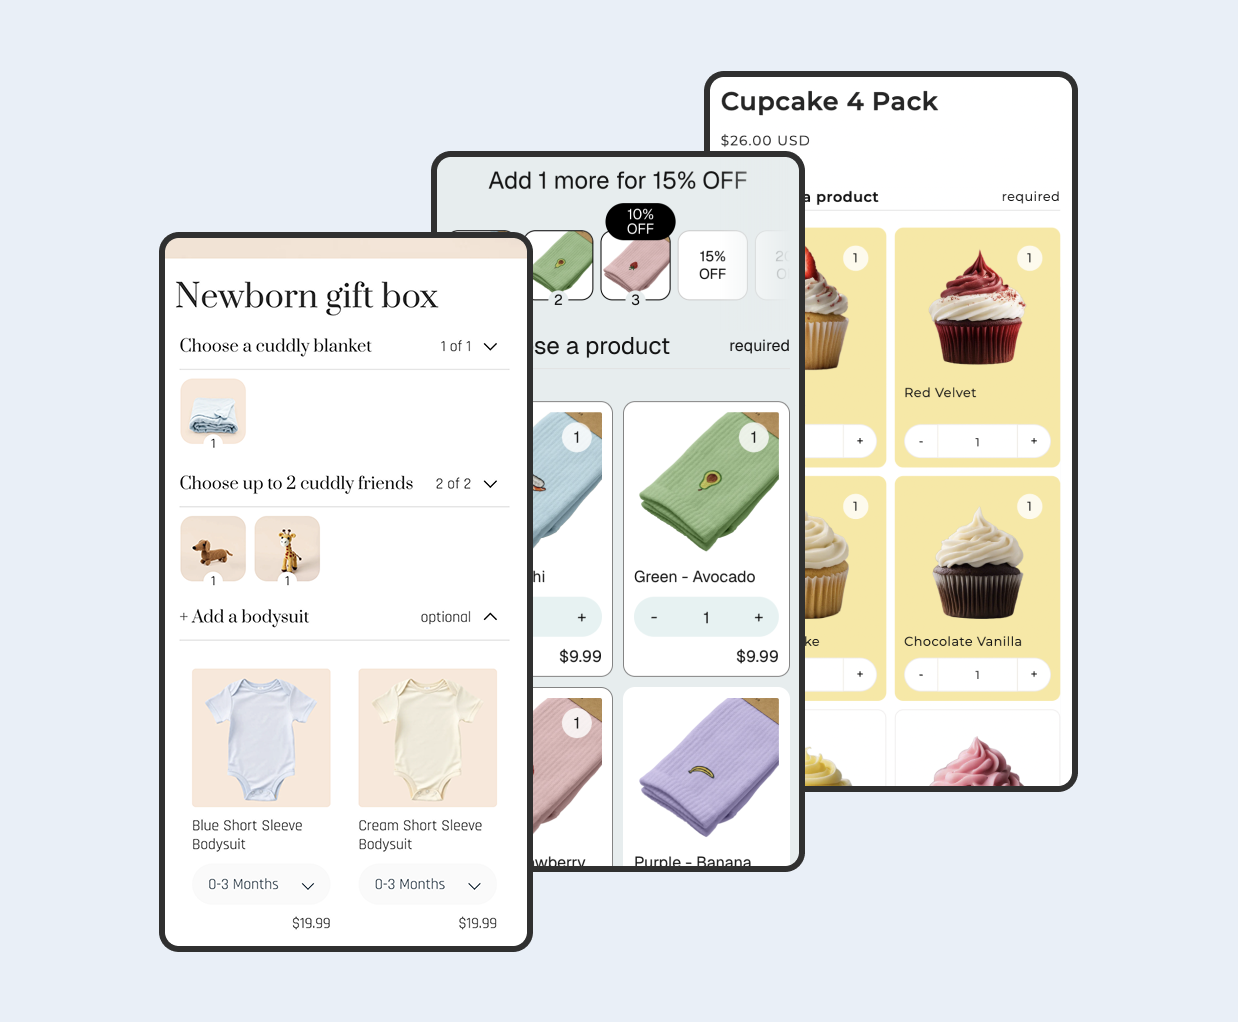
For merchants who want a multi-step bundle builder with features like collapsible accordion steps, required and optional selections, quantity selectors, and flexible pricing (sum of products, fixed price, percentage discounts, or volume discount tiers), Biscuits Bundles is a solid option. It is built on the Shopify Bundles platform and creates standard Shopify bundle products that work seamlessly with the WordPress plugin. You can see live examples of different bundle configurations on the Biscuits Bundles demos page.
To embed a bundle on WordPress, simply create your bundle product in Shopify using your preferred bundling app, wait for it to sync through the plugin, then insert it via the "Shopify Product" Gutenberg block on any page or post. A recipe blog post about meal planning, for example, could include a "Build Your Own Meal Kit" bundle right alongside the article content.
Side note - Bundle products created on Shopify's Bundles platform are sold through the Online Store sales channel. When embedded on WordPress via the Sell on WordPress plugin, inventory is tracked live in Shopify, and the bundle resolves to its individual component products at checkout for accurate fulfillment.
FAQ
Is the Sell on WordPress plugin free?
Sell on WordPress is the official Shopify plugin made to let you sell products easily on your WordPress site. It's free to download, install, and use. However, you do need an active Shopify plan to process transactions and manage products.
Does this replace WooCommerce?
Not exactly. WooCommerce is still around, but this gives Shopify users an easier way to pair content and commerce without migrating everything. If you already have a mature WooCommerce setup with custom infrastructure, a migration may not make sense. But for new projects or simpler catalogs, the Shopify plugin reduces plugin sprawl and maintenance.
Will the plugin affect my WordPress SEO?
The plugin doesn't interfere with SEO plugins like Yoast or Rank Math. Since content still lives in WordPress, your meta titles, schema, and structured data stay intact. The solution is intentionally lightweight to protect your site's performance and search engine rankings. Unlike bulky all-in-one WordPress ecommerce plugins, it keeps your site speed optimized by allowing search engines to focus on your content.
How much does Shopify checkout improve conversions?
Sell on WordPress converts 17% higher than the standard WooCommerce checkout, based on a study completed in April 2023 in partnership with a Big Three global management consulting company. This is because Shopify handles PCI compliance, fraud protection, and checkout optimization on your behalf.
Can I sell Shopify bundle products through the WordPress plugin?
Yes. Bundle products created using the Shopify Bundles platform appear as regular products in your Shopify catalog. They sync through the Sell on WordPress plugin and can be embedded on any WordPress page using the Shopify Product block. Apps like Biscuits Bundles create bundle products that are fully compatible with this workflow, letting you offer build-a-box experiences on Shopify while promoting them inside content-rich WordPress pages.
What are the main limitations?
You'll pay for a Shopify subscription, you're using Shopify's checkout (which means limited checkout customization without Shopify Plus), and you'll be managing content in WordPress and products/orders in Shopify, which adds some complexity. Product collection blocks don't yet offer frontend sorting or filtering options. Currently, only the main product image appears on WordPress; gallery images, zoom functionality, and "related products" suggestions are not shown.
 View on app store